UGENE provides command line interface (CLI). To learn more about UGENE CLI and commands available read main UGENE User Manual.
This chapter describes how you can create a new command using a workflow.
To run a workflow from the command line do the following:
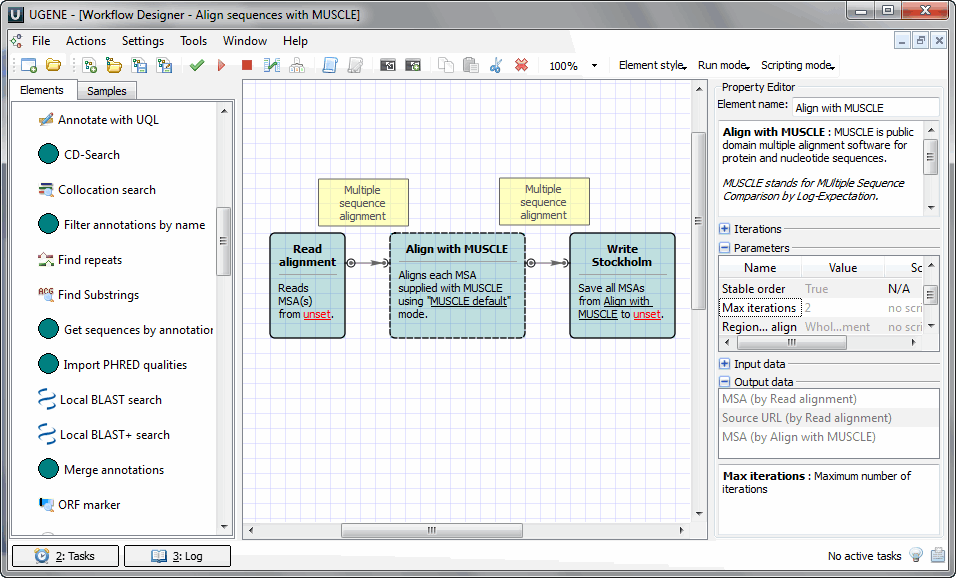
- Create the workflow in the Workflow Designer. For example on the image below the Align sequences with MUSCLE sample workflow is used:
- Now you should configure aliases for those parameters that you are going to use from the command line. To do it select the Actions ‣ Configure command line aliases item in the main menu or the Configure command line aliases toolbar button. The following dialog appears:
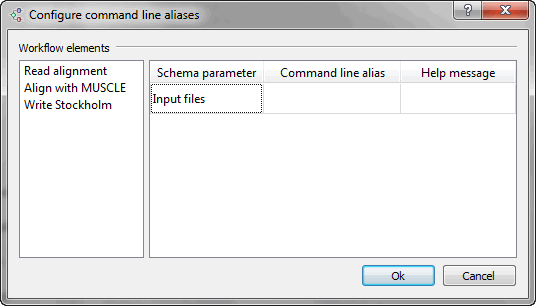
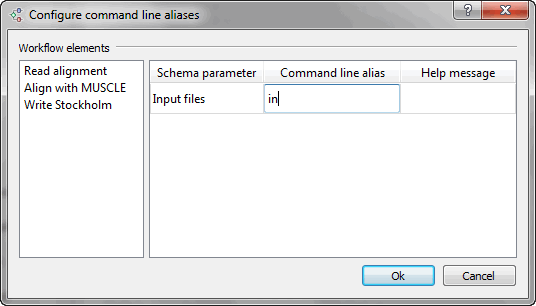
It contains the list of objects that corresponds to the elements of the workflow. For each object the list of parameters is available for which you can assign command line aliases. For example, assign alias in to parameter Input file (of the Read alignment element):
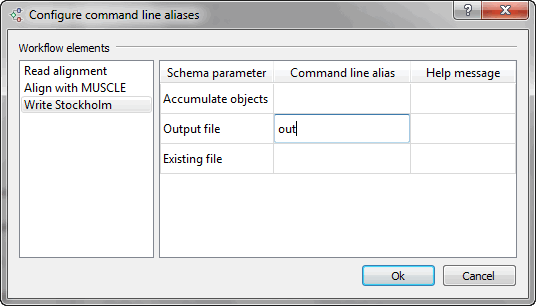
And alias out to parameter Output file (of the Write Stockholm element).
Press the Ok button to save aliases and close the dialog.
- Save the workflow to a file: if you follow the example, choose the Actions ‣ Save workflow as... item in the main menu, browse for the file location and enter mySchema as the workflow name. This name will be used to launch the workflow from the command line.
- Launch the workflow from the command line:
[path_to_ugene\]ugene --task={schema_name} [--{parameter1}={value1} [--{parameter2}={value2} ...]]
For example on Windows the command can look as follows:
ugene --task=C:\mySchema --in=C:\COI.aln --out=C:\COI.sto
In this example the path to the directory with the UGENE executable is added to the system PATH variable.